 Pin it
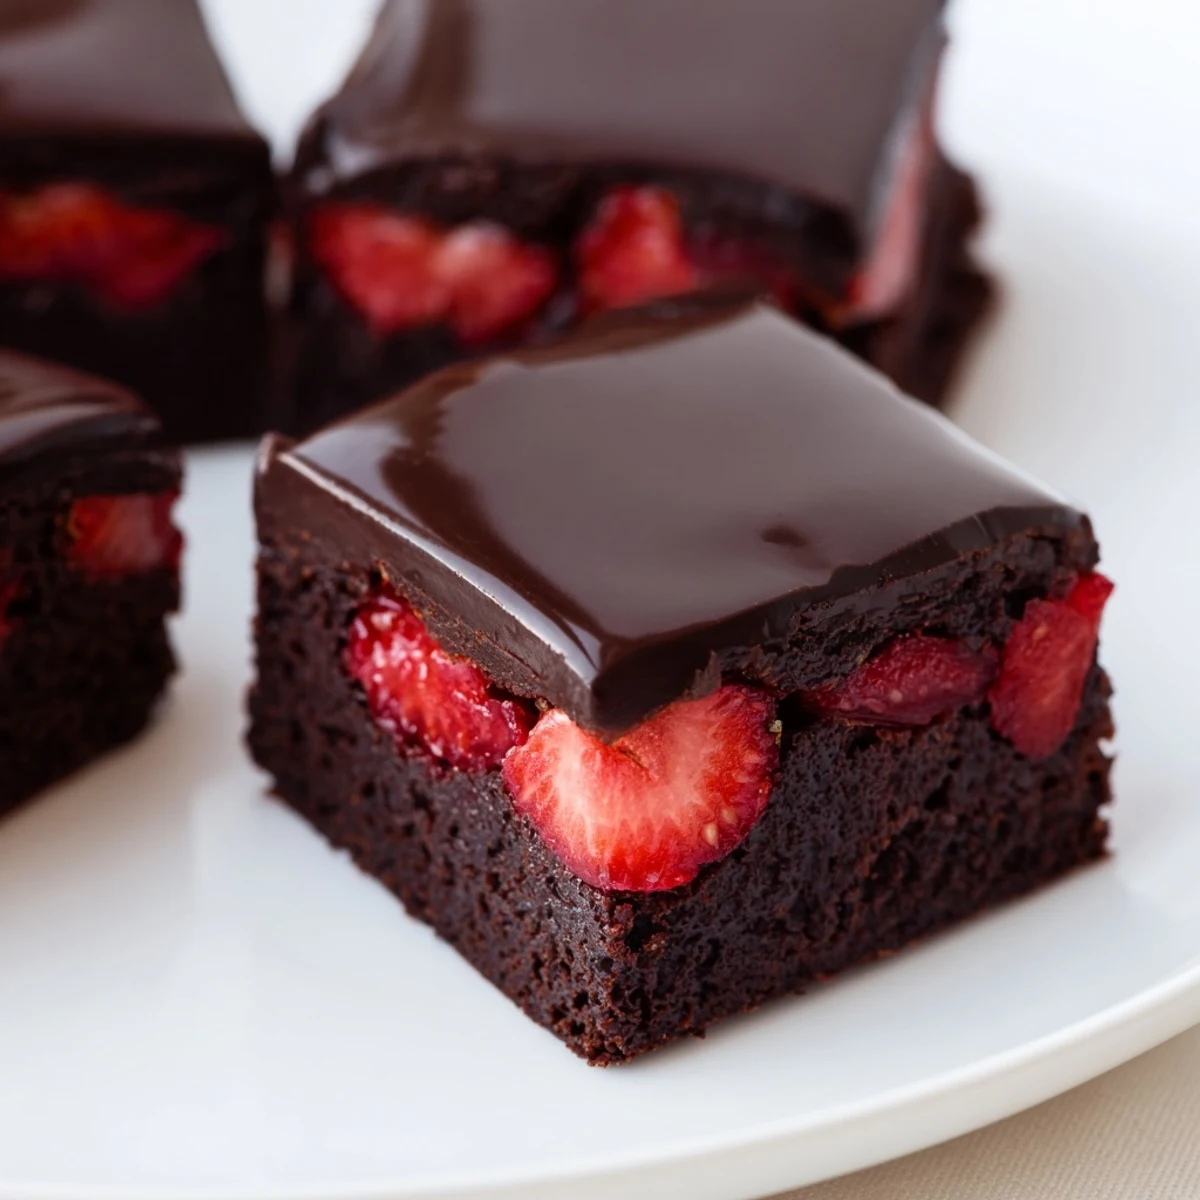
 These chocolate covered strawberry brownies combine three irresistible layers into one stunning dessert. A rich, fudgy brownie base baked to perfection provides the foundation, topped with a generous layer of fresh strawberry slices that add brightness and natural sweetness.
The whole creation is then cloaked in a smooth, glossy chocolate coating that snaps when you bite into it. They require just 25 minutes of prep and basic baking tools, making them an achievable yet impressive treat for weekend gatherings, holiday celebrations, or anytime you want something truly special.
The rain was hammering against the kitchen window the afternoon I stumbled into this recipe, looking for something that felt indulgent enough to justify staying indoors all day. I had a punnet of strawberries that were slightly past their prime and a half empty bag of chocolate chips staring back at me from the pantry. What started as a desperate attempt to use up ingredients turned into the most requested dessert in my friend group.
I brought a tray of these to a friends potluck dinner and watched three grown adults abandon conversation entirely to go back for seconds. Someone actually asked if I had ordered them from a shop, which remains one of the proudest moments of my amateur baking life.
Ingredients
- 115 g unsalted butter: The foundation of a properly fudgy brownie, do not substitute with margarine or the texture will suffer.
- 180 g semisweet chocolate chips (for brownie base): Melted into the butter for deep, rich flavor that cocoa powder alone cannot replicate.
- 150 g granulated sugar: Balances the bitterness of the chocolate and creates that desirable crinkly top.
- 55 g packed brown sugar: Adds moisture and a subtle caramel note that makes the brownie taste more complex.
- 2 large eggs: Bind everything together and contribute to the chewy interior, use room temperature eggs for smoother mixing.
- 1 tsp pure vanilla extract: Rounds out the chocolate flavor beautifully, never skip this.
- 90 g all-purpose flour: Measured by weight for accuracy, too much flour leads to cakey brownies instead of fudgy ones.
- 1/4 tsp salt: Essential for making the chocolate taste like itself.
- 300 g fresh strawberries, hulled and sliced: Use ripe but still firm berries so they hold their shape during slicing.
- 180 g semisweet chocolate chips (for coating): Combined with oil for a smooth, snappy topping.
- 1 tbsp coconut oil or neutral vegetable oil: Helps the chocolate coating set with a beautiful shine and clean snap.
Instructions
- Preheat and prepare:
- Set your oven to 175 degrees C (350 degrees F) and line a 22x22 cm baking pan with parchment paper, leaving generous overhang on two sides so you can lift the whole thing out later.
- Melt the chocolate and butter:
- In a microwave safe bowl, combine the butter with 180 g of chocolate chips and heat in 30 second bursts, stirring between each, until the mixture is completely smooth and glossy.
- Build the batter:
- Whisk both sugars into the melted chocolate until fully blended, then beat in the eggs one at a time followed by the vanilla. Fold in the flour and salt with a spatula, stirring just until no dry streaks remain, then spread the batter evenly into your prepared pan.
- Bake and cool:
- Bake for 25 to 30 minutes until a toothpick comes out with moist crumbs clinging to it, then let the brownies cool completely in the pan before adding anything on top.
- Layer the strawberries:
- Arrange the sliced strawberries in a single even layer across the entire surface of the cooled brownies, nestling them close together so every bite includes fruit.
- Create the chocolate coating:
- Melt the remaining 180 g of chocolate chips with the oil in 30 second intervals, stirring until the mixture is silky and pourable, then pour it directly over the strawberries and gently tilt the pan to coax the chocolate into every corner.
- Chill and slice:
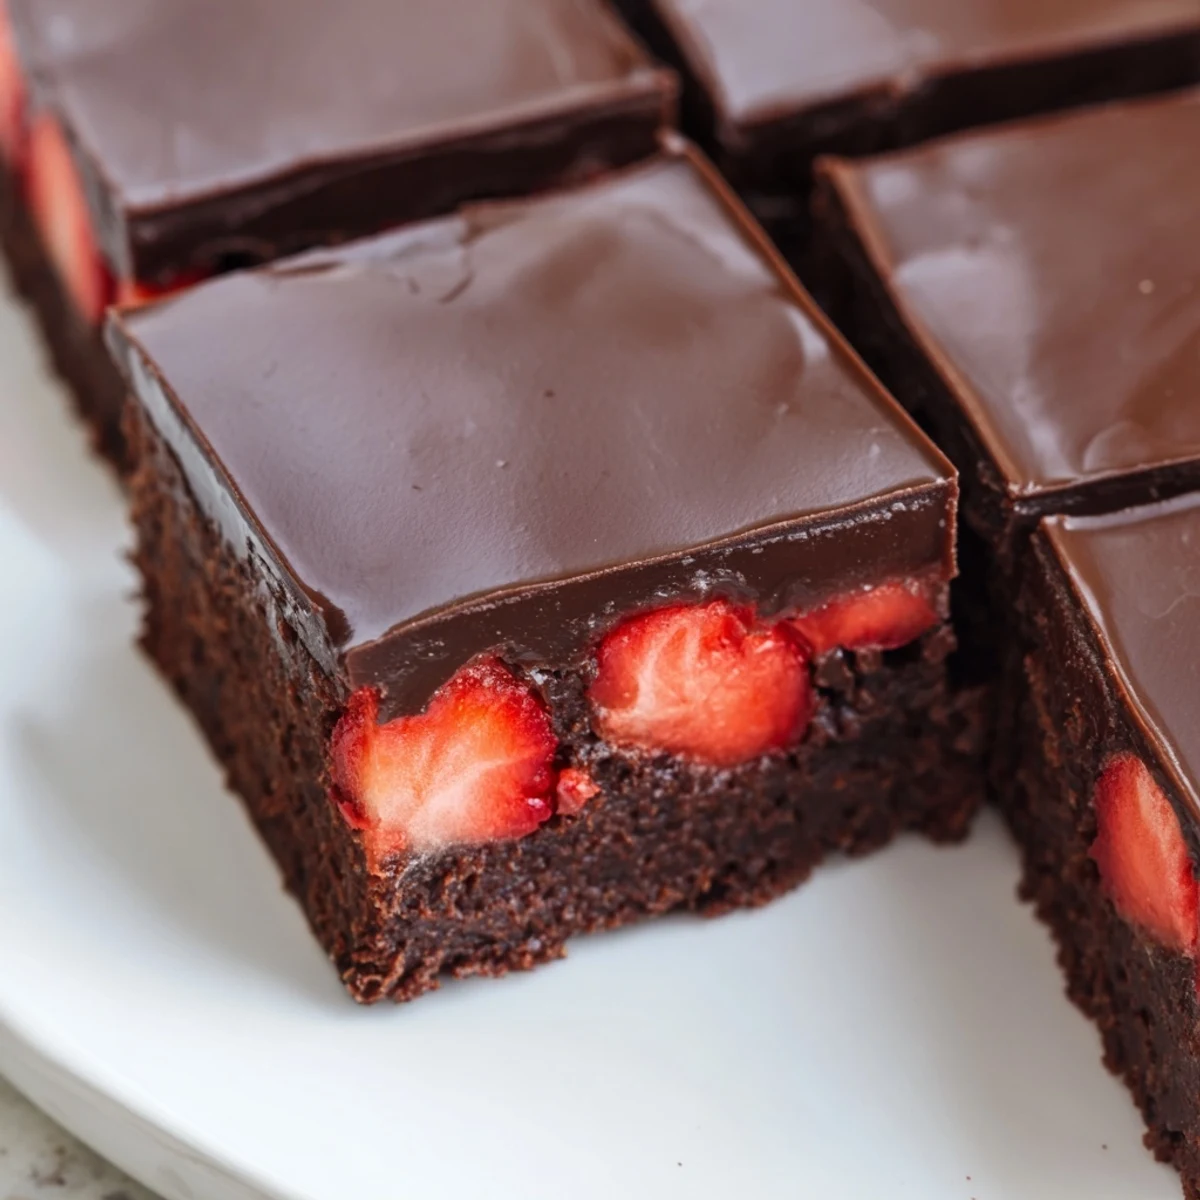
- Refrigerate the pan for at least 30 minutes until the top layer is firm to the touch, then use the parchment overhang to lift the whole slab out and cut into 12 squares with a sharp knife.
 Pin it
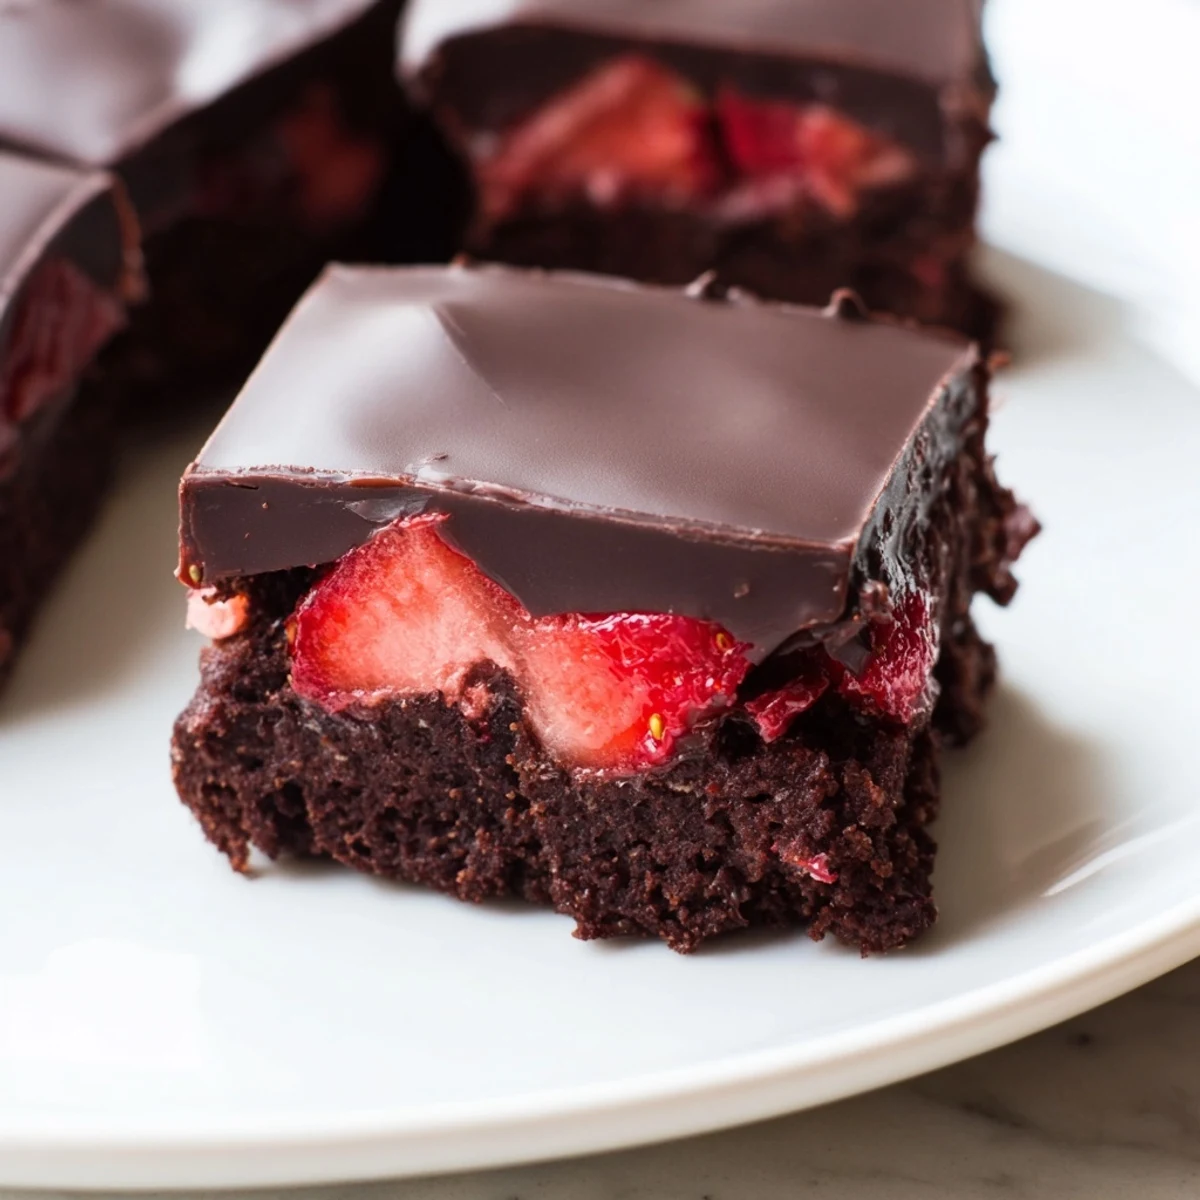
 There is something about the moment you slice through that firm chocolate top and hear the faint crack before hitting the soft brownie underneath that makes every minute of waiting worthwhile.
What If You Want to Change Things Up
Dark chocolate works beautifully in both the brownie base and the coating if you prefer a less sweet dessert with more depth. A friend of mine swears by adding a thin layer of raspberry jam between the brownie and the strawberries for extra fruitiness. You could also drizzle white chocolate over the set coating for a striking visual contrast that makes these look even more impressive.
Getting the Texture Right
The secret to brownies that walk the line between fudgy and structured is resisting the urge to overbake. Pull them from the oven when the toothpick still has moist crumbs, not wet batter, and carryover heat will finish the job. Overmixing the batter after adding flour develops gluten and turns brownies dense in an unpleasant way, so fold gently and stop as soon as the flour disappears.
Storing and Serving
These brownies keep well in the refrigerator for up to three days when stored in an airtight container, though the chocolate coating is nicest on the first day. Let them sit at room temperature for about ten minutes before serving so the brownie layer softens slightly and the textures sing together.
- A light dusting of flaky sea salt on top before the chocolate sets adds a sophisticated edge.
- Use a hot dry knife to cut cleaner squares, wiping the blade between each slice.
- These are best eaten within two days while the strawberries still taste fresh beneath the chocolate.
 Pin it
 Every time I make these, someone asks for the recipe, and I always say the same thing: trust the cooling times and use the best chocolate you can afford. That is honestly the whole secret.
Recipe Questions & Answers
- → Can I use frozen strawberries instead of fresh?
-
Fresh strawberries are strongly recommended for this dessert. Frozen berries release excess moisture as they thaw, which can seep into the brownie layer and prevent the chocolate coating from setting properly. If frozen is your only option, thaw and thoroughly pat the slices dry with paper towels before arranging them on the brownie base.
- → How do I get clean, neat slices when cutting these brownies?
-
For the cleanest cuts, refrigerate the assembled brownies for at least 30 minutes until the chocolate coating is fully set. Use a sharp knife dipped in hot water and wiped dry between each slice. The warm blade glides through the chocolate layer without cracking it, giving you professional-looking squares.
- → What type of chocolate works best for the coating?
-
Semisweet chocolate chips paired with a small amount of coconut oil create a smooth, glossy coating that sets with a satisfying snap. Dark chocolate is an excellent alternative if you prefer a more intense, less sweet finish. Avoid using chocolate chips alone without the oil, as they can seize or set too thickly without that silky spreadable consistency.
- → How should these brownies be stored?
-
Store them in an airtight container in the refrigerator for up to 3 days. The chocolate coating and fresh strawberry layer both require chilling to maintain their texture and freshness. Let them sit at room temperature for about 10 minutes before serving to soften slightly and enhance the flavors.
- → Can I make these brownies gluten-free?
-
Yes, simply substitute the all-purpose flour with a 1-to-1 gluten-free baking flour blend. Ensure your chocolate chips are also certified gluten-free, as some brands may have cross-contamination. The texture will remain fudgy and satisfying with this straightforward swap.
- → Why is my brownie base coming out dry instead of fudgy?
-
Overbaking is the most common cause of dry brownies. Pull them from the oven when a toothpick inserted in the center comes out with moist crumbs still clinging to it, not completely clean. The brownies will continue to set as they cool in the pan. Also be sure to measure flour accurately using the spoon-and-level method rather than scooping directly from the bag.
