 Pin it
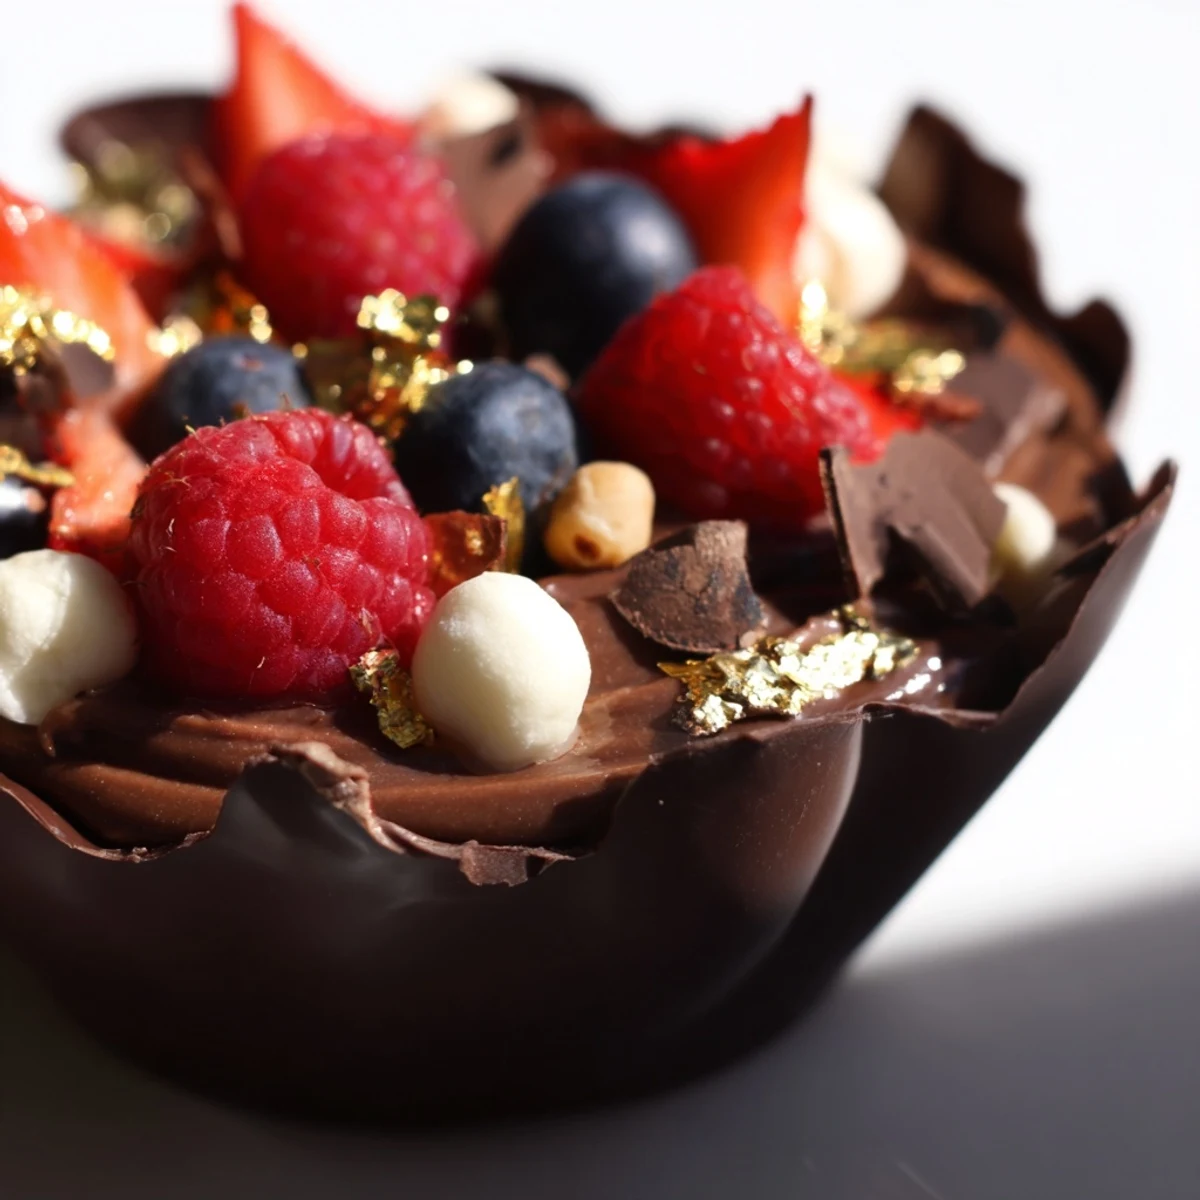
 Create stunning individual chocolate cups filled with silky smooth dark chocolate mousse and topped with fresh mixed berries, crunchy nuts, marshmallows, and chocolate curls. These elegant grazing cups combine luxurious textures and flavors—creamy mousse, crisp chocolate shells, juicy berries, and nutty crunch. Perfect for dessert tables, dinner parties, or special celebrations when you want to impress guests with something both beautiful and delicious. The individual portions make serving effortless while the combination of rich dark chocolate with fresh fruit creates the perfect balance of indulgent sweetness.
Last Valentine's Day, I decided to skip the restaurant crowds and create something intimate at home instead. These little chocolate cups became the centerpiece of my dining table, and watching my guests' eyes light up when they discovered the edible cup itself was pure magic. The best part? They look like you spent hours, but the secret is they come together faster than you'd believe.
I still remember the first time I attempted chocolate cups—I made them way too thick and they were impossible to bite through. After three tries, I discovered that painting thin, even layers is the key, and now I've got it down to a science. My sister actually asked if I'd bought them from a fancy chocolatier, which I took as the highest compliment.
Ingredients
- Dark chocolate (at least 60% cocoa): The higher cocoa percentage gives your cups structure while still being enjoyable to eat—dont go below 60 or they'll collapse
- Heavy cream: Cold from the fridge is non-negotiable here—warm cream won't whip properly no matter how long you beat it
- Powdered sugar: This dissolves seamlessly into the mousse without any grainy texture that granulated sugar might leave behind
- Vanilla extract: Pure extract makes a noticeable difference in the final flavor profile
- Fresh mixed berries: The tartness cuts through all that rich chocolate and prevents the dessert from feeling too heavy
- Chopped nuts: I love hazelnuts for their natural affinity with chocolate, but whatever you choose, toast them lightly first for maximum flavor
- Mini marshmallows: These add playful texture and nostalgia—I usually add extra because people always pick them off first
- Chocolate curls: Use a vegetable peeler on a room temperature chocolate bar for the most beautiful, effortless garnish
Instructions
- Melt and paint your chocolate cups:
- Work in short bursts, stirring every 20 seconds when microwaving, and use the back of a spoon to spread chocolate up the sides of your liners—thin but not transparent is your goal
- Chill until completely set:
- The chocolate should release cleanly from the liners without any sticking—if it resists, give it another 10 minutes in the fridge
- Whip your cream to soft peaks:
- Lift your whisk straight up—the cream should droop over slightly but hold its shape without collapsing back into itself
- Lighten that melted chocolate:
- Stir in one spoonful of whipped cream first—it'll look curdled and scary, but keep going and it'll smooth out beautifully
- Fold gently but thoroughly:
- Use a spatula to scoop from the bottom and fold over, rotating the bowl, until no white streaks remain but you haven't knocked all the air out
- Fill your cups:
- A piping bag gives the prettiest swirls, but a spoon works perfectly fine—just dont overfill or you'll have nowhere to put your toppings
- Arrange your toppings artistically:
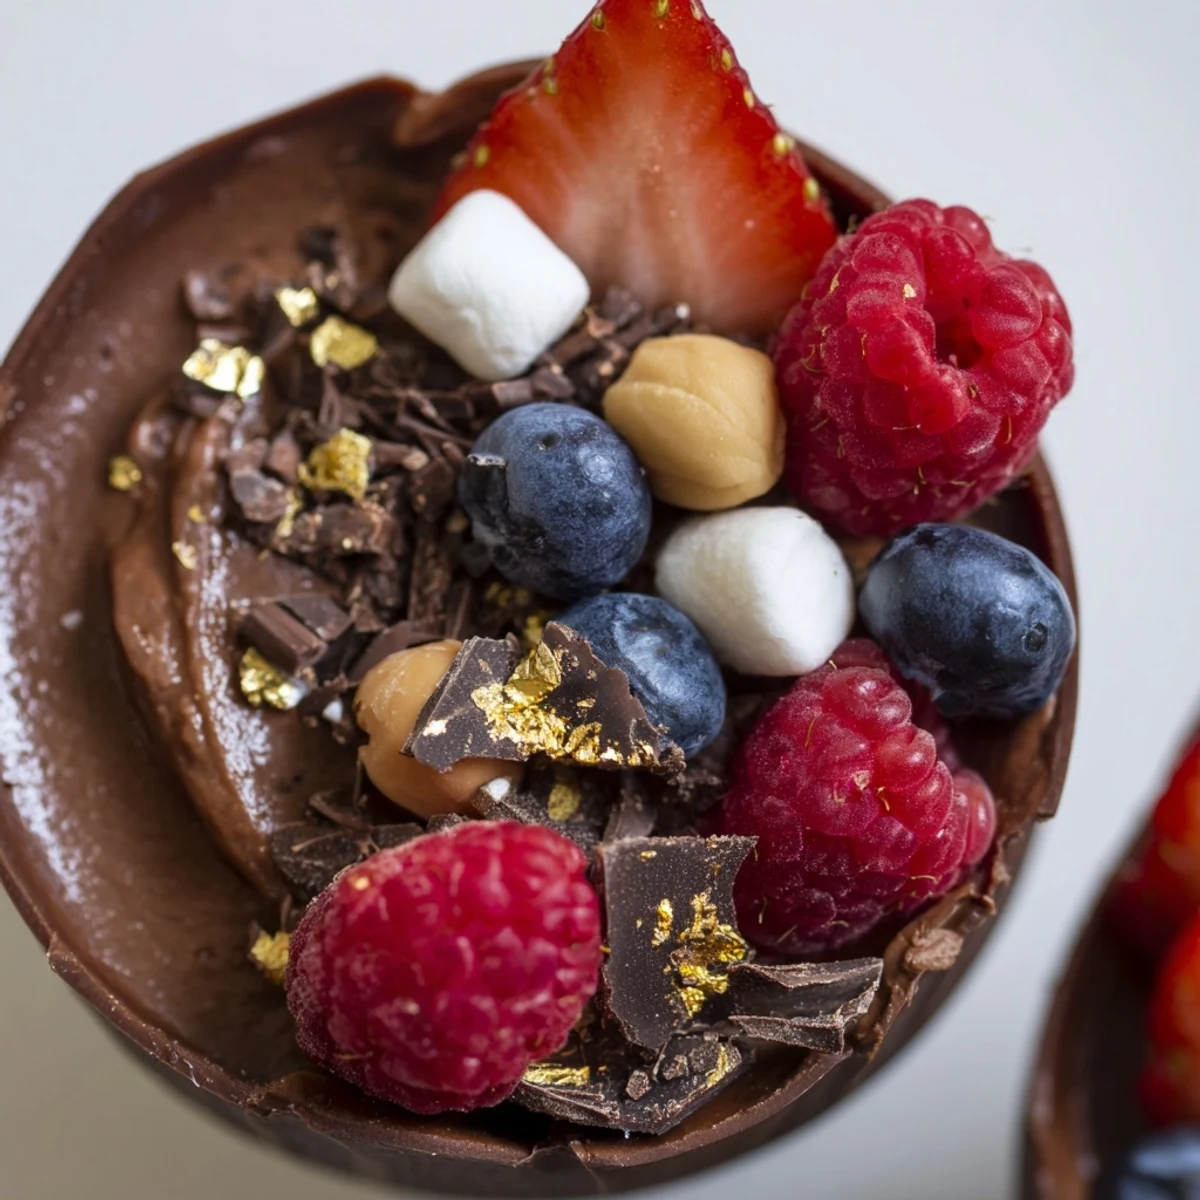
- Think of each cup as a tiny canvas—cluster berries on one side, sprinkle nuts opposite, and save the gold leaf for the final touch if you're feeling fancy
 Pin it
 When I served these at my best friend's engagement party last spring, the conversation around the dessert table stopped mid-sentence. People were actually taking photos before eating them, which I've never seen happen with any other dessert I've made. One guest told me later that she'd been dreaming about that chocolate cup for weeks.
Making Ahead Like a Pro
You can prepare the chocolate cups up to three days in advance, stored between layers of parchment paper in an airtight container. The mousse holds well for 24 hours in the fridge, but I've found that piping and garnishing within a few hours of serving keeps everything looking fresh and prevents the berries from weeping into the chocolate.
Chocolate Temperature Secrets
Room temperature chocolate curls easily but shatters if it's too cold, while melted chocolate needs to cool to about 85°F before folding into whipped cream or it'll deflate everything you've worked to build. An instant-read thermometer has saved me more times than I care to admit—theres no need to guess when precision is this accessible.
Customizing Your Flavor Profile
Infuse your cream with coffee grounds or earl grey tea leaves before whipping for subtle complexity that pairs beautifully with dark chocolate. A tablespoon of orange liqueur in the mousse adds sophistication, and swapping in white chocolate cups filled with dark mousse creates a stunning visual contrast your guests won't forget.
- Raspberries work better than strawberries because they don't release as much moisture
- Toast your nuts at 350°F for exactly 8 minutes—any longer and they'll taste bitter
- Gold leaf is entirely optional but makes an ordinary Tuesday feel like a celebration
 Pin it
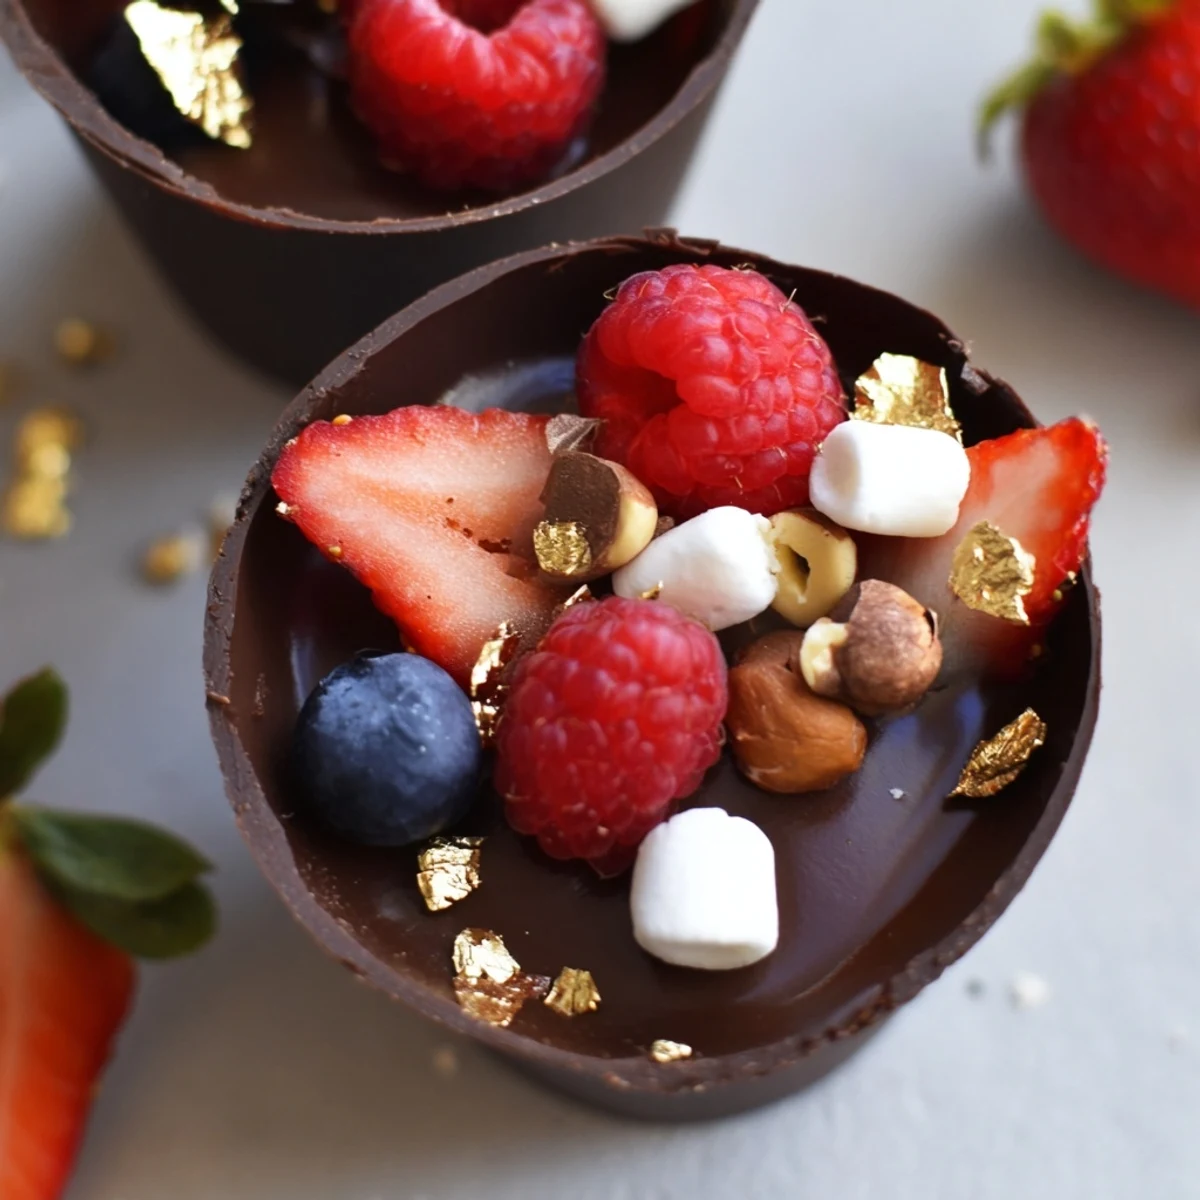
 There's something deeply satisfying about eating the container your dessert came in, and these cups never fail to make people smile. I hope they bring a little extra joy to your table too.
Recipe Questions & Answers
- → How far in advance can I make chocolate grazing cups?
-
For optimal texture and freshness, prepare these cups the same day you plan to serve them. The chocolate cups can be made up to 2 days ahead and stored in an airtight container. However, assemble with mousse and toppings within 4-6 hours of serving to prevent the mousse from becoming watery and toppings from losing their crunch.
- → What type of chocolate works best for the cups?
-
Dark chocolate with at least 60% cocoa content creates sturdy cups with a sophisticated flavor that balances the sweet mousse and fresh berries. The higher cocoa percentage helps the cups set firmly and creates a satisfying snap when bitten. Milk or white chocolate can be used but will result in softer, sweeter cups.
- → Can I make these without cupcake liners?
-
Silicone or paper liners are essential for creating the cup shape. Without them, you would need specialized chocolate molds or small spherical molds. The liners provide structure while the chocolate sets and can be easily peeled away once firm. Silicone liners work particularly well as they release cleanly and can be reused.
- → What other toppings work well with chocolate mousse cups?
-
Beyond berries and nuts, consider fresh whipped cream dollops, crushed cookies, pretzel pieces for salt contrast, shredded coconut, candied citrus peel, or edible flowers. For seasonal variations, try spiced poached pears in autumn, fresh stone fruits in summer, or candied ginger and crystallized mint for holiday gatherings.
- → How do I prevent the chocolate cups from cracking or breaking?
-
Ensure your chocolate is properly tempered—melted gently and cooled slightly before brushing into liners. Apply an even, moderately thick layer (about 1/8 inch) for strength. Chill thoroughly until completely set before attempting to remove liners. Handle cups gently by the sides rather than the delicate rims when peeling away liners.
- → Can these be made dairy-free?
-
Yes, substitute coconut cream or a plant-based heavy cream alternative in the mousse. Use dairy-free dark chocolate for both cups and mousse—many premium dark chocolates are naturally dairy-free, but always check labels for milk ingredients. The texture will be slightly different but still delicious and satisfying.
