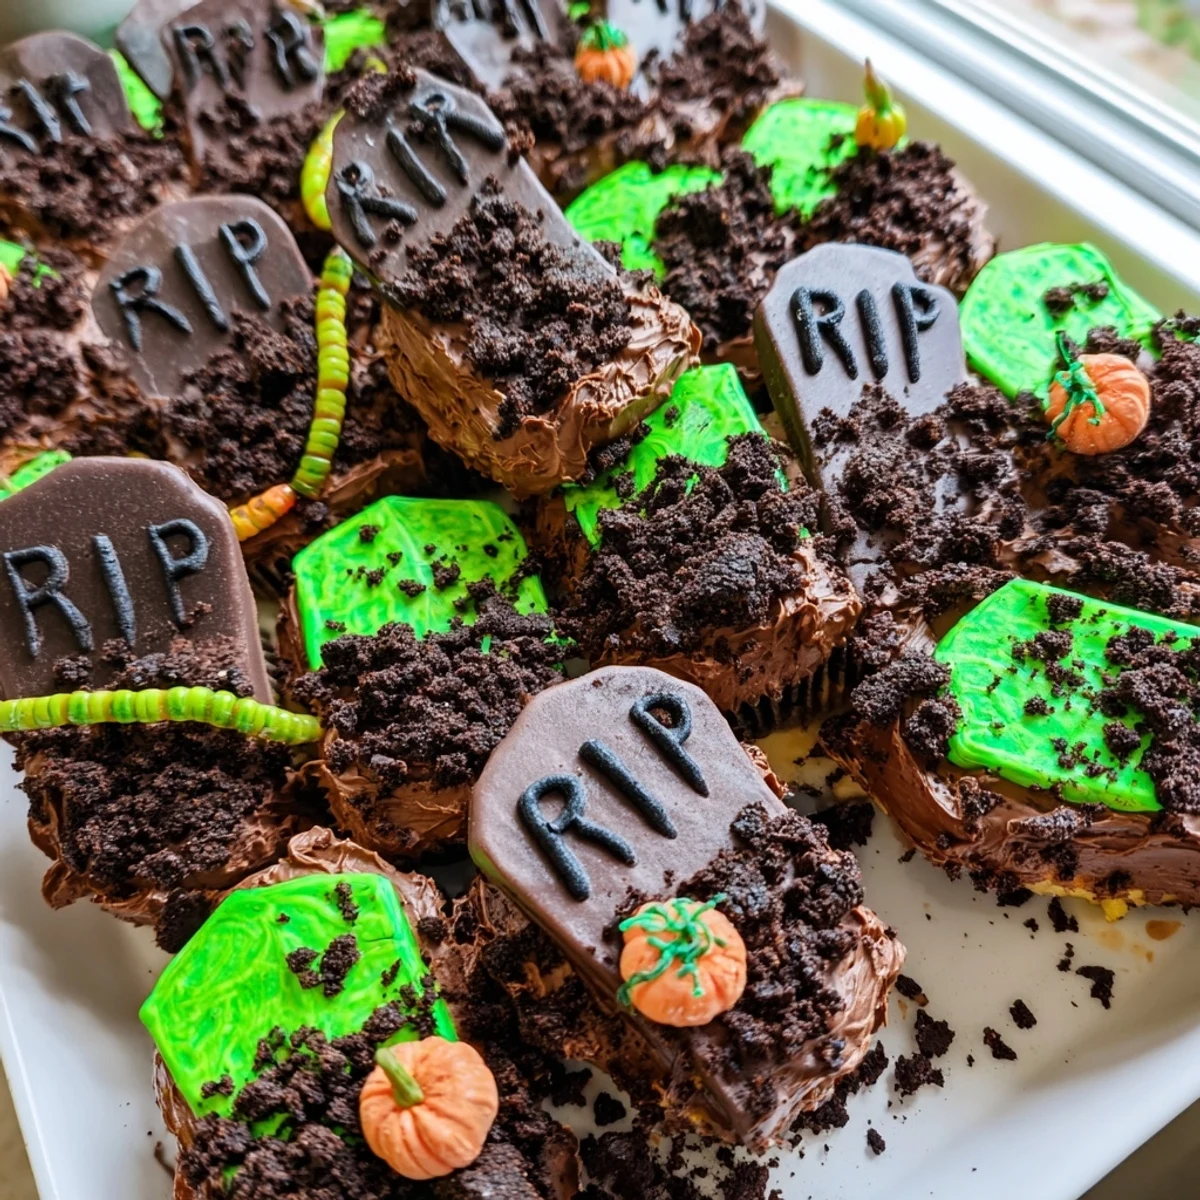
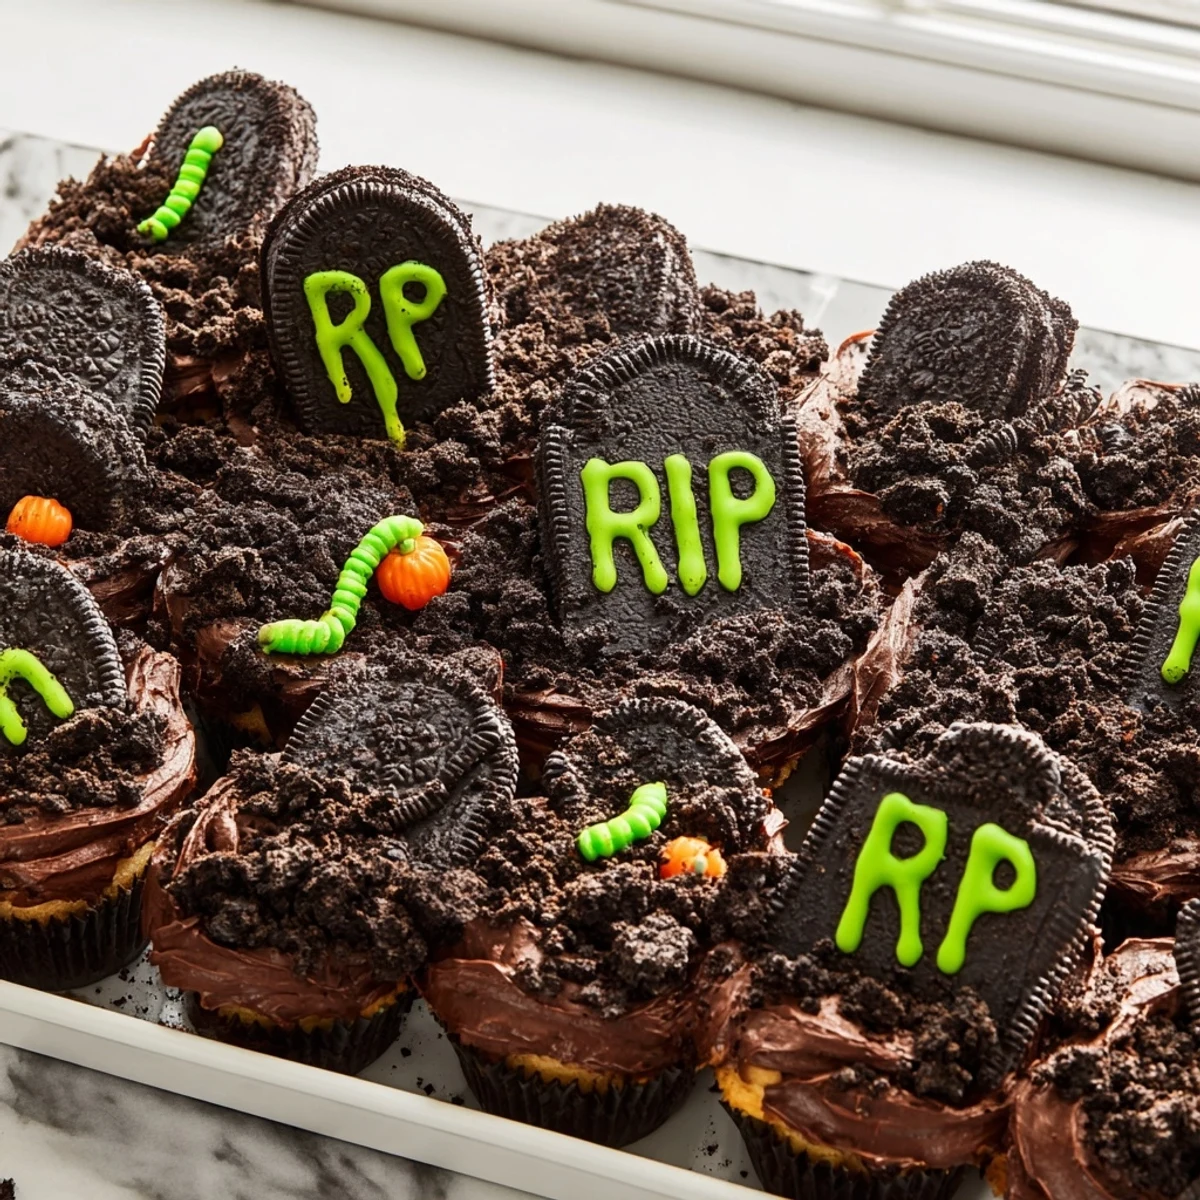
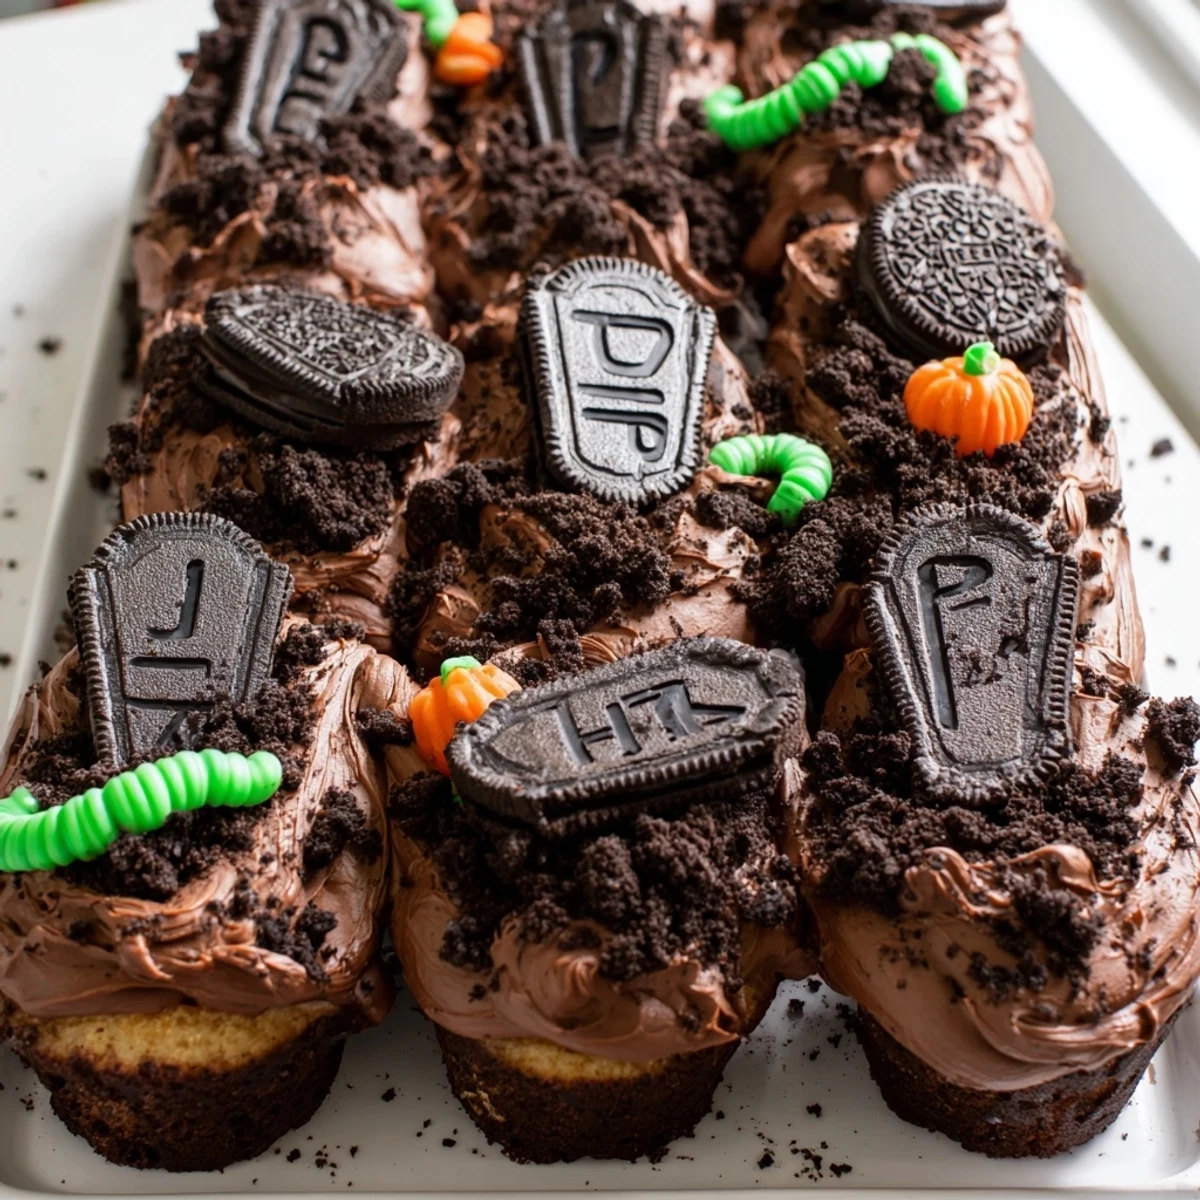
 Pin it
 Create a showstopping Halloween dessert with these chocolate cupcakes arranged together and covered in smooth chocolate frosting. The magic happens when you crushed chocolate cookies sprinkle over the top as soil, while decorated rectangular cookies stand in as spooky tombstones.
The moist chocolate base comes together easily with basic pantry ingredients, while the rich buttercream frosting provides the perfect canvas for your graveyard scene. Kids and adults alike will love adding gummy worms, candy pumpkins, and writing creepy messages on the cookie tombstones.
Assembly takes just minutes after baking, and you can customize the decorations based on what Halloween candies you have on hand. The pull-apart format makes serving effortless at parties.
Last Halloween, my daughter grabbed my apron and declared we needed something spookier than our usual pumpkin cookies. We spent the afternoon covered in chocolate frosting and crushed cookies, laughing as our graveyard kept looking more like a chocolate explosion than a cemetery. By the time her friends arrived, the cupcakes were ready and disappeared faster than a ghost at midnight.
My neighbor asked what I was making when she saw me crushing cookies with a rolling pan, and I invited her over to help with tombstone designs. We sat at my kitchen table drawing creepy messages on rectangular cookies with gel icing, competing for the spookiest handwriting. Her batch of tombstones ended up so good that I started saving graveyard decorating specifically for when she visits.
Ingredients
- 1 ½ cups all-purpose flour: The foundation of tender cupcakes that hold up under all that heavy frosting without getting soggy
- 1 cup granulated sugar: Sweetens the crumb while creating that lovely cracked dome that makes frosting spread like a dream
- ½ cup unsalted butter, softened: Room temperature butter incorporates properly for a fluffy texture rather than dense or greasy results
- ½ cup whole milk: Adds moisture and richness, though any milk you have on hand works perfectly fine
- 2 large eggs: Bind everything together while providing structure to support the graveyard decorations
- 2 tsp baking powder: Gives these cupcakes their lift so they are tall enough to create a convincing graveyard surface
- 1 tsp vanilla extract: Pure vanilla makes a noticeable difference in the final flavor of both cupcakes and frosting
- ¼ tsp salt: Balances the sweetness and enhances the chocolate flavor in the frosting
- 1 cup unsalted butter, softened: You want this perfectly soft for frosting that spreads smoothly without tearing the cupcakes
- 2 ½ cups powdered sugar: Creates that fluffy stable frosting that holds decorations in place
- ½ cup unsweetened cocoa powder: Dutch process cocoa gives the deepest darkest color for authentic graveyard dirt
- 2-3 tbsp milk: Adjust this to get your frosting to spreading consistency
- 6-8 chocolate sandwich cookies: Oreos work perfectly but any chocolate sandwich cookie creates convincing dirt when crushed
- 6-8 rectangular cookies: Ginger snaps or vanilla wafers have the right shape and sturdy texture for tombstones
- Gel icing pens: These write clearly on cookie surfaces unlike regular frosting which tends to bleed
Instructions
- Get your oven ready:
- Preheat to 350°F and line your muffin tin with liners while the oven comes up to temperature
- Make the cupcake batter:
- Cream butter and sugar until fluffy, beat in eggs one at a time with vanilla, then alternate adding dry ingredients and milk until just combined
- Bake them up:
- Fill each liner 2/3 full and bake for 18 to 20 minutes until a toothpick comes out clean, then let them cool completely before frosting
- Whip up the chocolate frosting:
- Beat butter until creamy, then gradually add powdered sugar and cocoa powder before pouring in vanilla and milk until smooth
- Build your graveyard base:
- Arrange cooled cupcakes in a tight rectangle on your serving tray and frost them all together like one continuous cake surface
- Create the spooky scene:
- Sprinkle crushed cookies over the frosting for dirt, write RIP messages on rectangular cookies with gel icing, and press them into the cupcakes as tombstones
- Add the final creepy touches:
- Tuck gummy worms halfway into the dirt, scatter candy pumpkins around the tombstones, and chill briefly so everything sets
 Pin it
 Last year my nephew decided our graveyard needed a fence made from pretzel sticks and an entrance made from candy corn. The finished creation was so elaborate that nobody wanted to ruin it by eating, until someone broke off a tombstone cookie and suddenly the whole graveyard vanished in minutes.
Making Them Gluten Free
Using a cup for cup gluten-free flour blend works perfectly in this recipe, though the cupcakes may be slightly more delicate. Just be sure your sandwich cookies and rectangular cookies are also certified gluten-free, or the graveyard decorations become landmines for sensitive guests.
Getting The Dirt Right
The secret to realistic dirt is crushing the cookies unevenly, leaving some larger chunks for texture and some fine powder for depth. I put cookies in a zip top bag and use a rolling pan, going back and forth until I have a mix that looks like actual soil rather than sand.
Decorating With Kids
This recipe shines as a group activity because the decorating step allows everyone to add their own spooky touches to the graveyard scene.
- Set up a decorating station with bowls of different candies so kids can design their own tombstone areas
- Have wet wipes ready because chocolate frosting and sticky fingers go hand in hand
- Take photos of the finished graveyard before serving because these creations disappear quickly
 Pin it
 These cupcakes have become the most requested Halloween treat in my house, and I love watching friends hesitate before destroying our creepy creation. That moment of admiration right before everyone digs in is exactly what Halloween baking should feel like.
Recipe Questions & Answers
- → How far ahead can I make these?
-
Bake and frost the cupcakes up to two days before serving. Add the crushed cookie dirt and tombstone decorations within 4-6 hours of serving to keep them crisp and prevent moisture from making them soggy.
- → Can I use boxed cake mix?
-
Absolutely. Boxed chocolate cake mix works perfectly as a time-saving alternative. Just prepare according to package directions and proceed with the homemade chocolate frosting and graveyard decorations for the best presentation.
- → What cookies work best for tombstones?
-
Rectangular vanilla wafers, shortbread fingers, or even Milano-style cookies make excellent tombstones. The key is finding something flat and sturdy enough to stand upright in the frosting without falling over.
- → How do I store leftovers?
-
Keep assembled cupcakes in an airtight container at room temperature for up to two days. If storing longer, refrigerate but bring to room temperature before serving for the best texture and flavor.
- → Can I make these gluten-free?
-
Simply swap the all-purpose flour for your favorite gluten-free flour blend in the cupcakes, and use gluten-free sandwich cookies for the dirt and decorations. Everything else naturally works for gluten-free diets.
