 Pin it
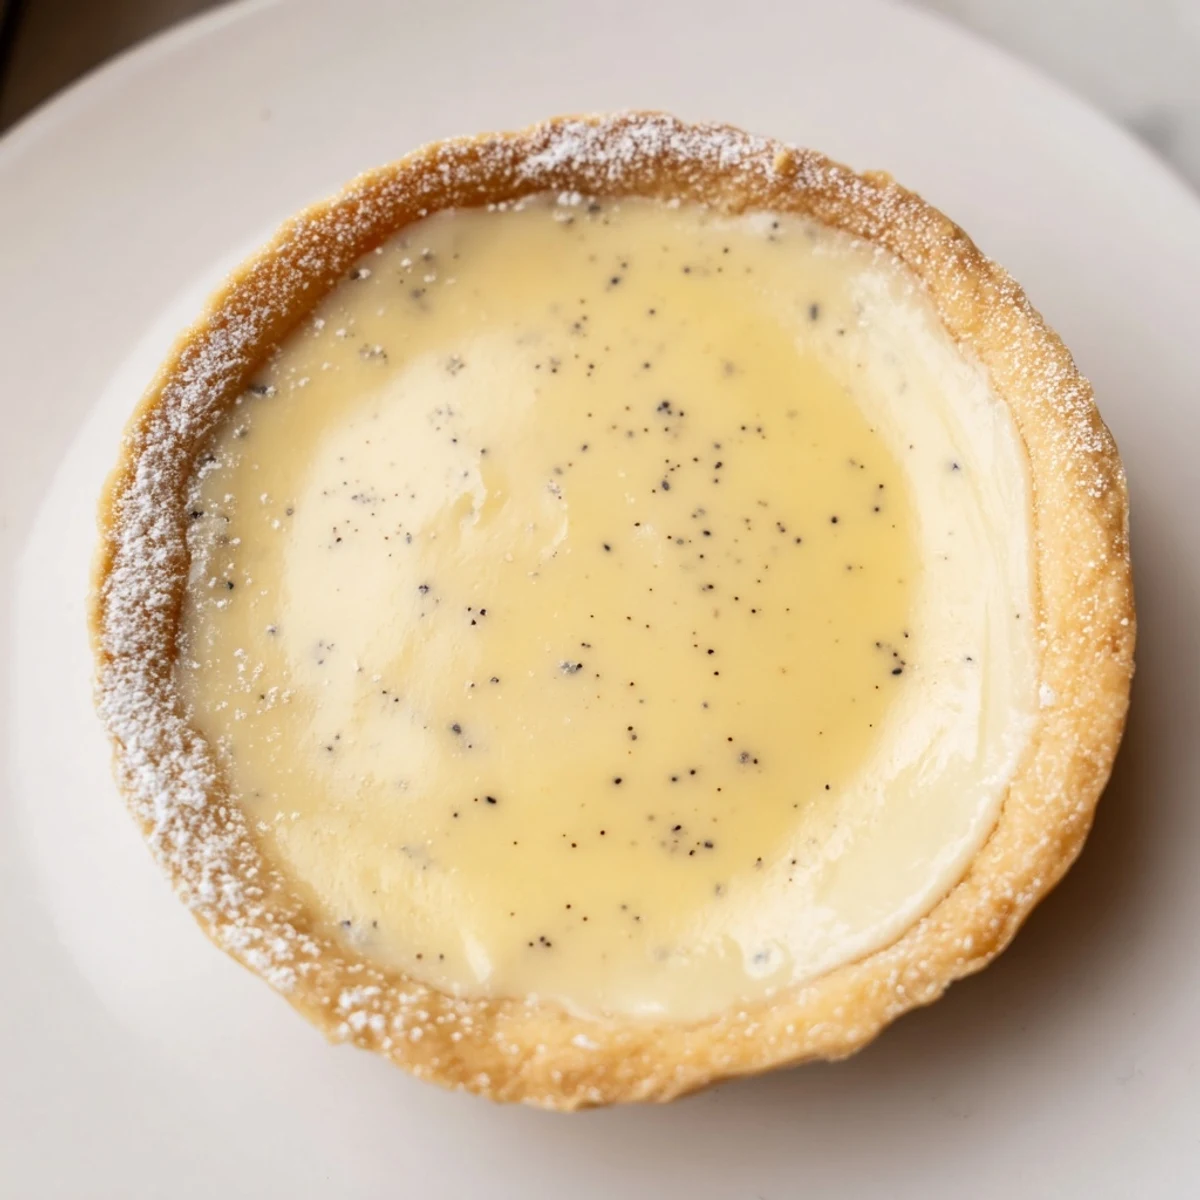
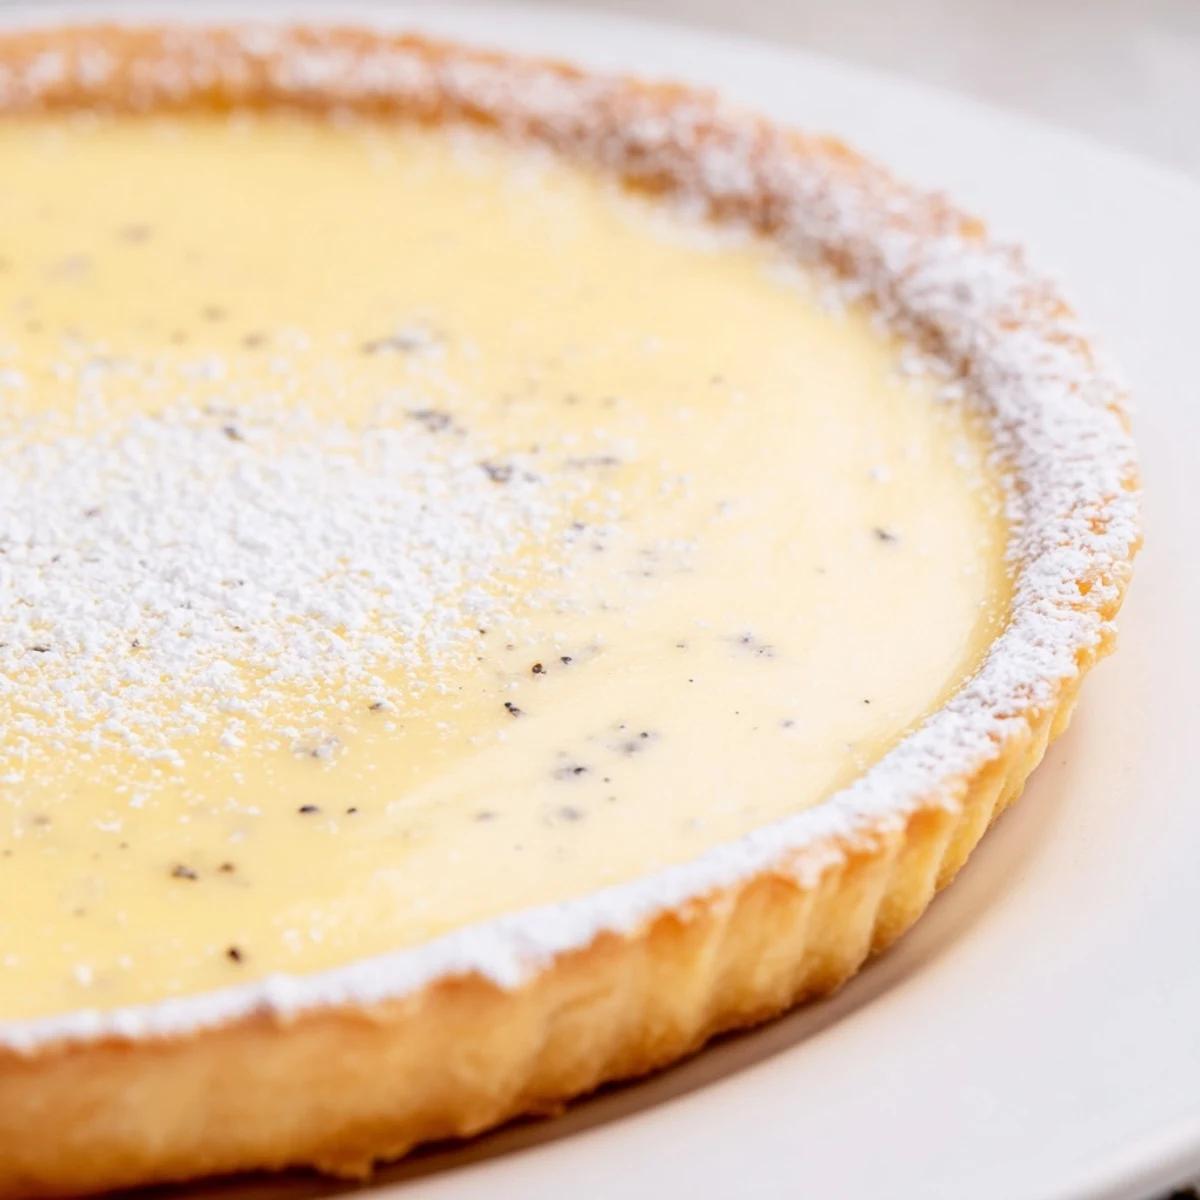
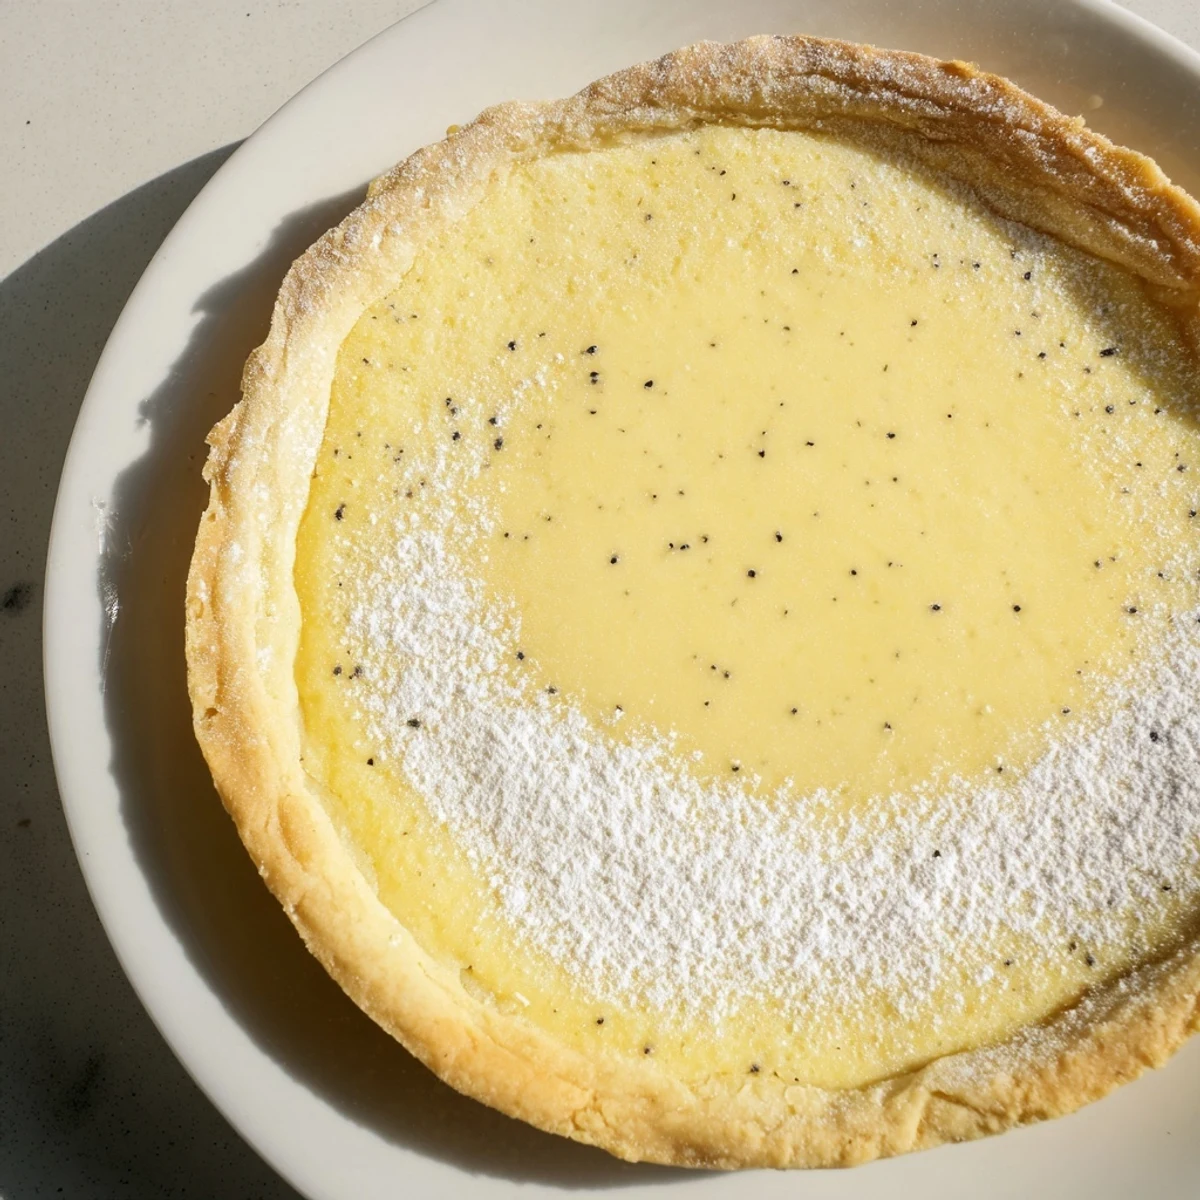
 This elegant French-inspired tart combines a tender, buttery pastry crust with a luscious vanilla bean custard filling. The crust bakes up golden and crisp, providing the perfect vessel for the silky pastry cream infused with real vanilla bean seeds. The result is a beautifully balanced dessert that feels luxurious yet comforting.
Ideal for dinner parties, holidays, or whenever you want to serve something impressive, this tart can be prepared in advance. The pastry cream develops deeper flavor when made ahead, and the crust stays perfectly crisp for hours.
My tiny Paris apartment kitchen had barely enough counter space for a cutting board, but somehow I managed to make my first vanilla bean tart there. The scent of those tiny black seeds simmering in milk filled every corner of the room, making even the cramped space feel luxurious. I burned the first crust, but the second attempt taught me that patience matters more than perfection. Now every time I slice into a finished tart, I'm back in that little kitchen with its uneven floor tiles and the afternoon light streaming through the window.
Last summer I made this for my parents anniversary dinner. My dad usually prefers chocolate anything, but he took one bite of this vanilla tart and went quiet for a full minute. That's the moment I knew this recipe was special enough to become part of our family's story.
Ingredients
- 1 1/4 cups all-purpose flour: The foundation of your crust, giving it structure and that satisfying tender crumb
- 1/2 cup unsalted butter, cold: Cold butter is the secret to flaky layers, so don't let it sit out too long
- 1/4 cup powdered sugar: Creates a more tender, delicate crust than granulated sugar would
- 1/4 tsp fine sea salt: Just enough to make all the flavors pop without tasting salty
- 1 large egg yolk: Adds richness and helps bind the dough together beautifully
- 2 tbsp ice water: The glue that brings your dough together, added drop by drop
- 2 cups whole milk: Full fat makes all the difference for a truly creamy pastry cream
- 1 vanilla bean: Scrape every single seed, those tiny black specks are pure gold
- 4 large egg yolks: The thickening power behind your silky smooth custard
- 1/2 cup granulated sugar: Sweetens the cream just enough without overpowering the vanilla
- 1/4 cup cornstarch: This is what transforms milk into luscious, velvety pastry cream
- 2 tbsp unsalted butter, softened: Whisked in at the end for that glossy, professional finish
Instructions
- Make the crust dough:
- Pulse flour, powdered sugar, and salt in your food processor until they're well acquainted. Add cold butter and pulse until the mixture looks like sandy crumbs with some pea-sized pieces still visible. That texture is exactly what creates flaky layers later.
- Bring the dough together:
- Add the egg yolk and pulse a few times, then drizzle in ice water one tablespoon at a time. The dough should just barely hold together when pressed between your fingers, too much water makes it tough. Flatten into a disk and wrap it up.
- Chill thoroughly:
- Refrigerate the dough for at least one hour, but don't stress if it needs longer. Cold dough bakes up tender and resists shrinking in the oven. This resting period lets the flour hydrate and the butter firm up again.
- Prep your oven:
- Heat your oven to 350°F while the dough chills. This ensures the oven is fully hot when your crust goes in, which helps set the structure quickly. A properly preheated oven makes all the difference.
- Roll and shape:
- On a lightly floured surface, roll the dough into a round about 11 inches across. Work quickly and gently, keeping the dough moving so it doesn't stick. Transfer it to your tart pan and press it gently into the corners and up the sides.
- Blind bake the crust:
- Line the crust with parchment and fill it with pie weights or dried beans. Bake for 15 minutes, then carefully remove the paper and weights. Return to the oven for another 8 to 10 minutes until the bottom is golden and set. Let it cool completely before filling.
- Infuse the milk:
- Combine the milk with your scraped vanilla bean seeds and the pod in a saucepan. Heat over medium until you see tiny bubbles forming around the edges, then remove it from the heat. Let it steep for 10 minutes to really pull out all those floral vanilla notes.
- Prepare the egg mixture:
- Whisk egg yolks, sugar, cornstarch, and pinch of salt until completely smooth and pale yellow. Take your time here, any lumps of cornstarch will be nearly impossible to fix later.
- Temper the eggs:
- Slowly pour about half of the hot milk into the egg mixture while whisking constantly. This gradual warming prevents the eggs from scrambling. Pour everything back into the saucepan.
- Cook until thick:
- Cook over medium heat, whisking constantly and scraping the bottom corners of the pan. The mixture will suddenly thicken and bubble, keep whisking for another full minute to cook out the cornstarch taste. You'll know it's done when it holds its shape.
- Add the finishing butter:
- Remove from heat and whisk in the soft butter until completely melted and incorporated. This step adds incredible richness and gives the pastry cream a gorgeous glossy sheen. Transfer to a bowl and press plastic wrap directly onto the surface.
- Chill completely:
- Refrigerate the pastry cream for at least one hour, but two is even better. It needs to be completely cold before filling your tart shell. This can be made up to two days ahead, which is actually quite convenient.
- Assemble your tart:
- Spread the chilled pastry cream evenly into your cooled tart shell using an offset spatula or the back of a spoon. Make gentle swoops for a pretty presentation. Top with fresh berries if you like, or leave it beautifully simple.
 Pin it
 My friend's daughter once helped me make this tart, carefully scraping every last seed from the vanilla bean like it was precious treasure. She was so proud of that tart, beaming at the dinner table and telling everyone she made it. That's exactly why I love sharing these recipes, they become someone else's memory too.
Getting the Perfect Crust
I've learned that the most common mistake with tart crusts is overworking the dough. Once you can see the butter pieces have reduced to about pea size, stop pulsing. Those little butter pockets melting between layers of flour are what create that beautiful flaky texture. If the dough feels sticky while rolling, pop it back in the fridge for 10 minutes. Cold dough is your friend.
Mastering Pastry Cream
The first few times I made pastry cream, I was terrified of scrambling the eggs. The key is really taking your time during the tempering stage, pouring that hot milk in a slow, steady stream while whisking vigorously. Once you're cooking the final mixture on the stove, don't stop whisking for even a second. The difference between perfectly smooth cream and a grainy mess is just a few moments of inattention.
Serving and Storage
This tart is best served the same day it's assembled because the crust will eventually soften from the creamy filling. That said, I've served leftovers the next day and still received rave complaints. The flavor actually develops overnight as the vanilla continues to infuse the cream.
- Slice with a sharp knife dipped in hot water for clean cuts through the cream
- Let the tart sit at room temperature for about 15 minutes before serving
- Store any leftovers loosely covered in the refrigerator
 Pin it
 There's something deeply satisfying about making a tart that looks like it came from a French patisserie but tastes like home. Hope this recipe finds its way into your own kitchen memories.
Recipe Questions & Answers
- → Can I make the pastry cream ahead of time?
-
Yes, the pastry cream can be prepared up to 2 days in advance. Store it in an airtight container with plastic wrap pressed directly onto the surface to prevent a skin from forming. Keep refrigerated until ready to use.
- → What's the best way to prevent a soggy bottom crust?
-
Properly blind-baking the crust is essential. Line the dough with parchment paper and fill with pie weights or dried beans. This prevents the crust from puffing up or becoming soggy when you add the creamy filling later.
- → Can I use vanilla extract instead of vanilla bean?
-
While vanilla bean provides those beautiful visible seeds and intense flavor, you can substitute with 2 teaspoons of high-quality vanilla bean paste or pure vanilla extract. The flavor will still be delicious, though you'll miss the visual appeal of the seeds.
- → How should I store the finished tart?
-
Store the assembled tart in the refrigerator, covered loosely with plastic wrap or a dome. It's best enjoyed within 24 hours as the crust will gradually soften from the moisture in the filling. For optimal texture, add fresh fruit toppings just before serving.
- → Can I freeze this tart?
-
The unfilled baked crust can be frozen for up to 3 months, well-wrapped. However, the assembled tart doesn't freeze well due to the creamy texture of the pastry cream. For best results, prepare the crust ahead, freeze it, then make fresh pastry cream when ready to serve.
- → What fruits work best as toppings?
-
Soft berries like raspberries, strawberries, blueberries, or blackberries complement the vanilla beautifully. For seasonal variations, try sliced stone fruits like peaches or plums in summer, or poached pears in winter. Arrange the fruit artistically just before serving.
