 Pin it
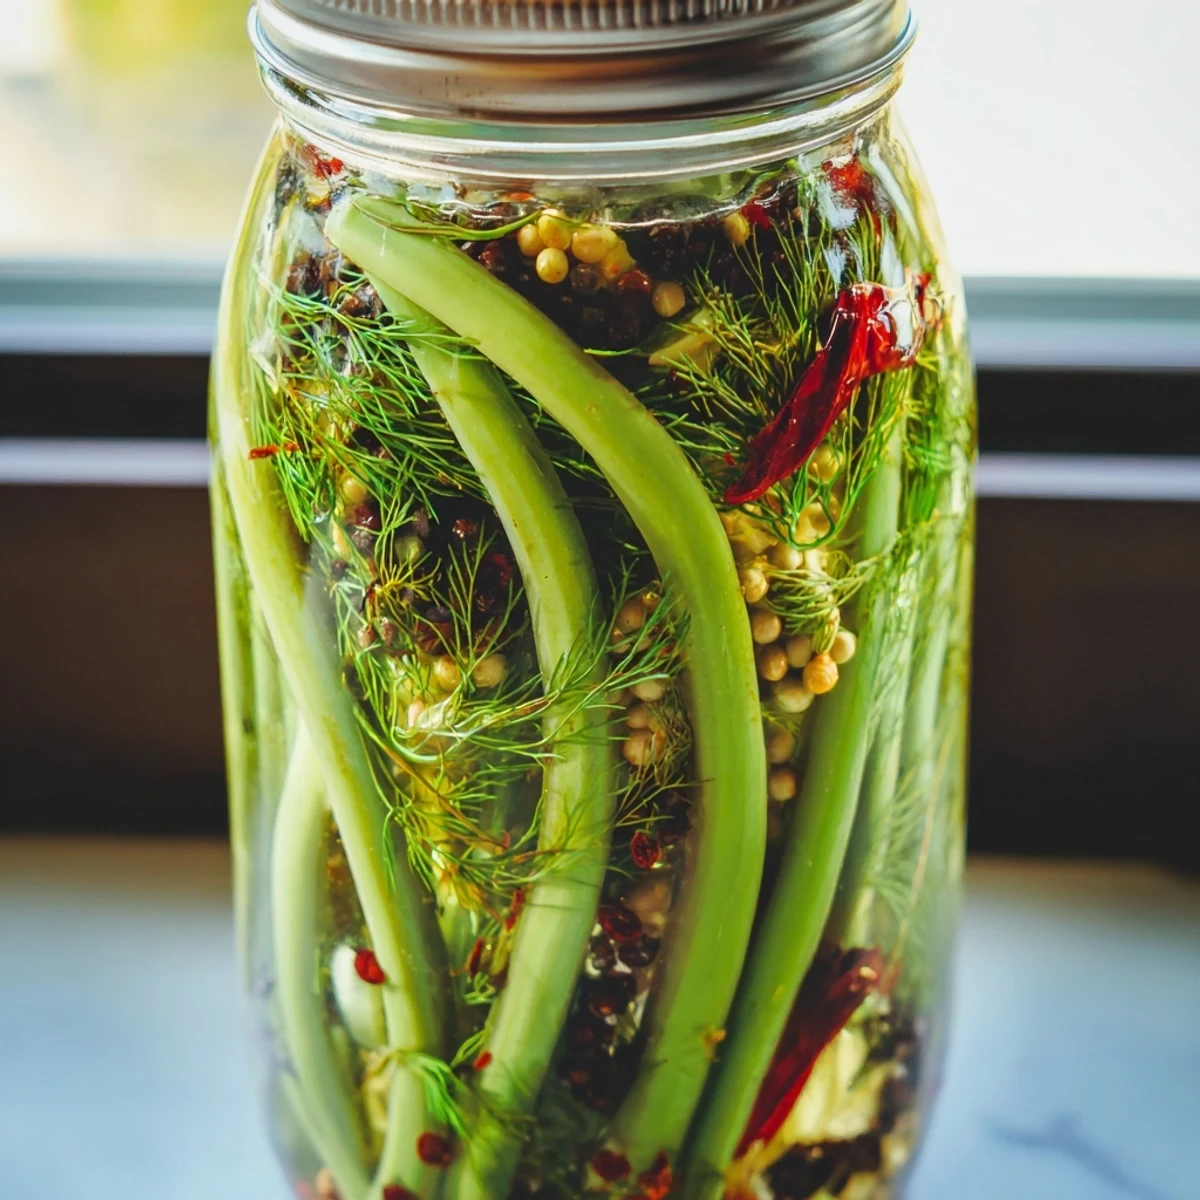
 Create vibrant, tangy garlic scapes with a spicy kick using this simple pickling method. Fresh scapes are preserved in a balanced vinegar brine infused with black peppercorns, mustard seeds, coriander, and dried chilies. The result is a crunchy, zesty condiment that intensifies over time.
Perfect for elevating cheese boards, adding crunch to sandwiches, or serving alongside grilled meats. These pickled scapes develop their full flavor after one week of refrigeration and stay fresh for up to a month.
stumbled upon these curly green shoots at the farmers market last June, wondering what on earth they were. The farmer handed me a raw one to taste and the fresh garlic punch hit me instantly. I bought three bunches on the spot and spent that weekend experimenting with pickling methods. Now my fridge is never without a jar.
My sister in law threatened to steal my entire jar during our summer barbecue last year. She ended up eating them straight from the jar with a fork while standing at the open refrigerator. I had to teach her how to make her own batch just to protect my supply.
Ingredients
- Garlic Scapes: Choose bright green firm scapes without any yellowing or wilted sections for the best texture
- Distilled White Vinegar: Provides the clean sharp acidity needed to balance the natural sweetness of the scapes
- Granulated Sugar: Just enough to round out the sharpness without making these taste sweet
- Kosher Salt: Essential for proper pickling and enhancing all the spice flavors
- Black Peppercorns: Adds a warm earthy backbone to the brine
- Mustard Seeds: These provide a subtle tangy pop when you bite into them
- Coriander Seeds: Brings a lovely citrus note that complements the garlic beautifully
- Red Pepper Flakes: Adjust up or down depending on your heat tolerance
- Dried Chilies: Whole chilies look gorgeous in the jar and infuse gradual warmth
- Bay Leaves: Adds a subtle herbal depth to the background
- Fresh Dill: Optional but adds a classic pickle flavor that reminds me of summer
Instructions
- Get Your Jars Ready:
- Wash those jars and lids thoroughly in hot soapy water then either boil them for 10 minutes or run them through a hot dishwasher cycle. You want everything squeaky clean.
- Prep Those Curly Scapes:
- Trim the tough ends from your garlic scapes then cut them into lengths that fit your jars. They can be curled and tucked like snakes to pack them in tightly.
- Start Packing:
- Divide the scapes dill sprigs and dried chilies between your two sterilized jars. Pack them in as tightly as you can without crushing them.
- Add the Spice Blend:
- Split the peppercorns mustard seeds coriander red pepper flakes and bay leaves evenly between the jars. Watch those spices settle into all the nooks and crannies.
- Create the Brine:
- Combine the vinegar water sugar and salt in a saucepan over high heat. Bring it to a rolling boil stirring constantly until every crystal disappears into the liquid.
- Pour and Submerge:
- Carefully ladle that hot brine over the scapes making sure they are completely covered. Leave about half an inch of space at the top.
- Seal and Wait:
- Screw those lids on tight and let the jars cool completely on the counter before moving them to the fridge. The hard part begins now.
 Pin it
 I learned this lesson the hard way after my first batch turned mushy from overpacking. Now I leave a little breathing room and the texture stays perfectly crisp every single time.
The Art of Pickling
Pickling is essentially controlled fermentation with acid instead of bacteria. The vinegar penetrates the cell walls of the scapes transforming their raw bite into something complex and tangy. This process creates that perfect balance between sharp and refreshing.
Serving Suggestions
These pickled scapes shine brightest on a charcuterie board nestled between sharp cheddar and crusty bread. I also chop them into potato salad or use them as a garnish for bloody marys at brunch. Their vibrant color makes any plate look more inviting.
Storage and Shelf Life
Keep your jars refrigerated at all times since this is not a shelf stable canning recipe. The scapes will stay crunchy for up to a month though they rarely last that long in my house. The flavors continue to evolve over time becoming more nuanced with each passing week.
- Always check for any off smells or mold before eating
- The brine can be reused once for a quick pickle of sliced vegetables
- Label your jars with the date so you can track their aging
 Pin it
 There is something deeply satisfying about opening that jar and hearing the pop of the vacuum seal. These pickles have become my go to hostess gift and the jars always come back empty.
Recipe Questions & Answers
- → What do garlic scapes taste like?
-
Garlic scapes have a milder, sweeter flavor compared to garlic cloves with a texture similar to asparagus. When pickled, they become tangy and absorb the spices beautifully.
- → How long should I wait before eating?
-
Wait at least 48 hours for the flavors to develop, though the scapes taste even better after one week of pickling in the refrigerator.
- → Can I adjust the spice level?
-
Absolutely. Increase the red pepper flakes or add more dried chilies for extra heat, or reduce them for a milder version.
- → How long do these keep?
-
When properly refrigerated, these pickled garlic scapes stay fresh for up to one month while maintaining their crunch and flavor.
- → What dishes pair well with pickled scapes?
-
They complement charcuterie boards, grilled meats, cheese platters, and add wonderful zest to salads, sandwiches, and Bloody Mary drinks.
- → Can I reuse the brine?
-
The brine can be used once more for pickling additional vegetables, though the flavor will be slightly less intense than the first batch.
