 Pin it
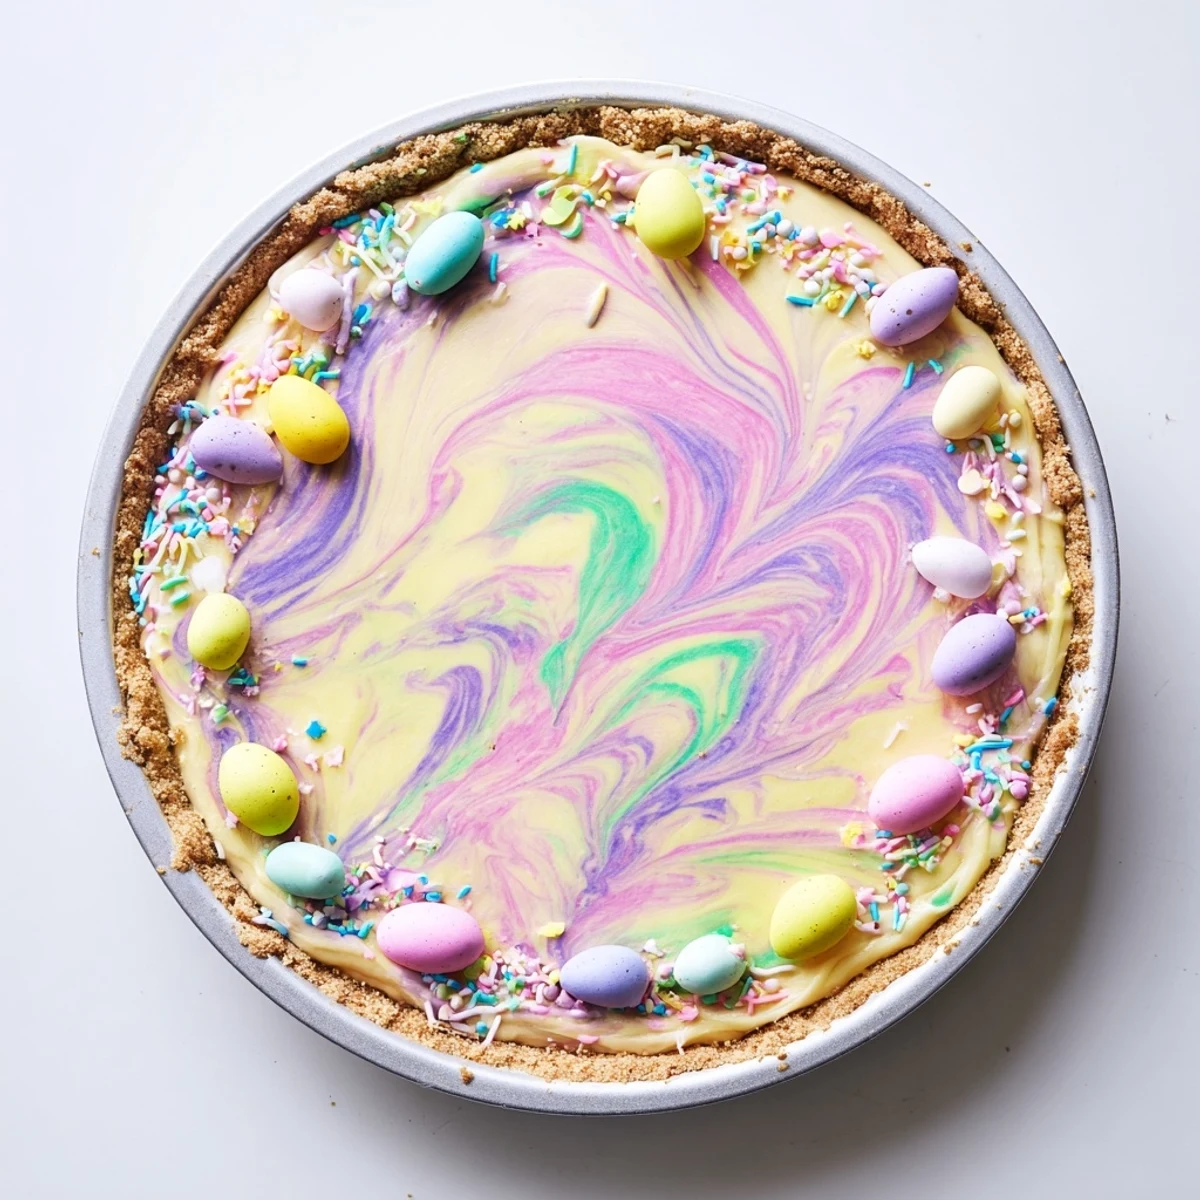
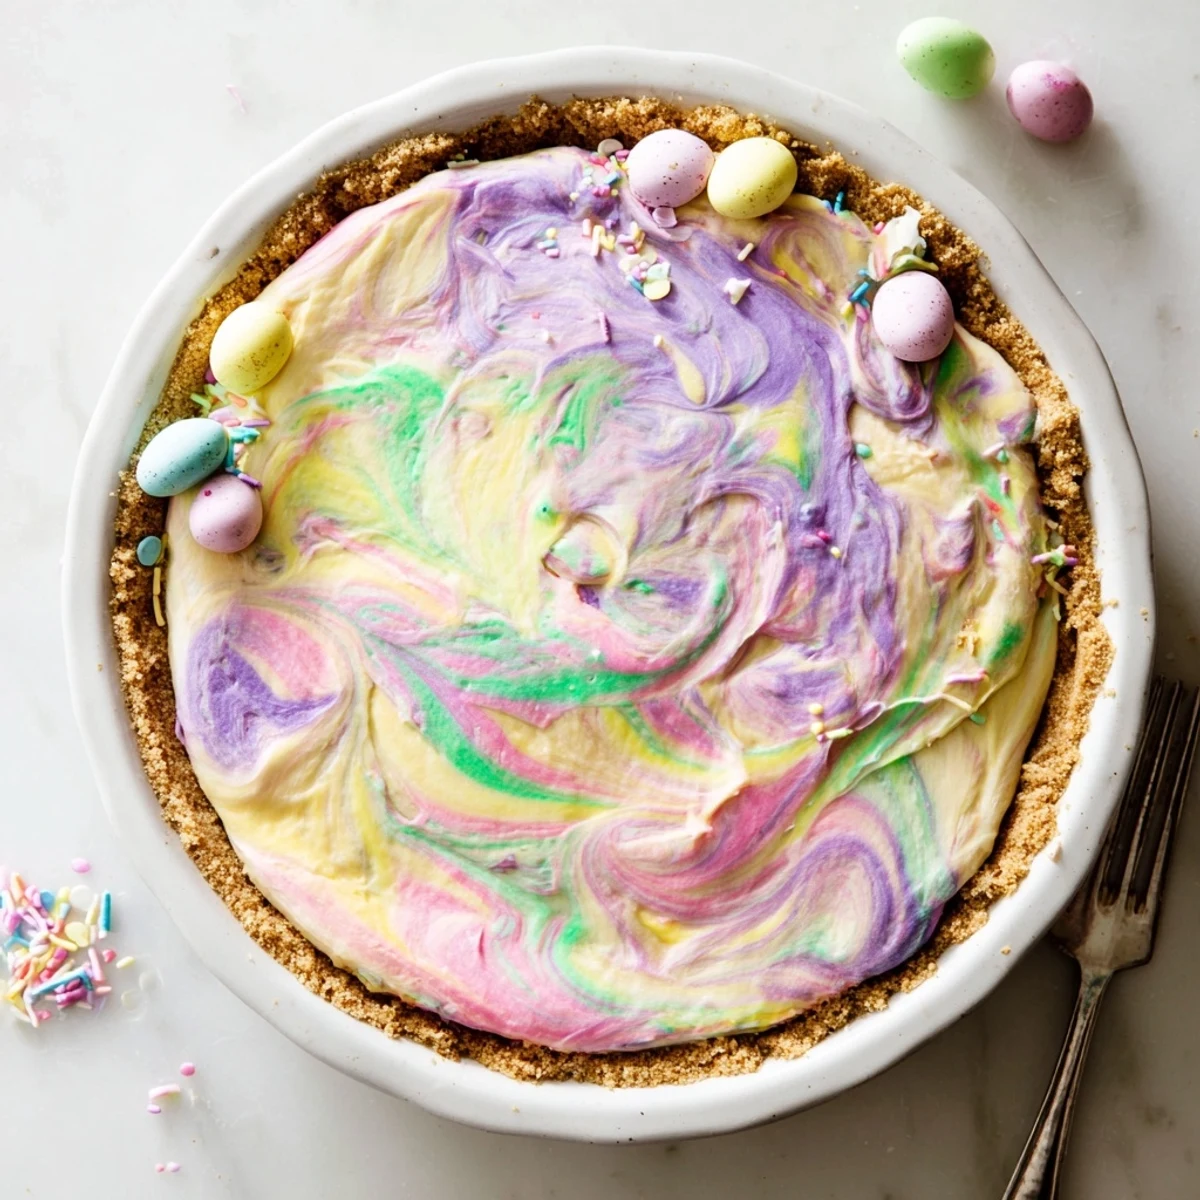
 This vibrant swirled dessert combines smooth cream cheese and mascarpone filling with light whipped cream, creating a luscious vanilla base. The filling is divided and tinted with soft pastel gel colors, then spooned randomly into a baked graham cracker crust and gently swirled together for a beautiful marbled effect. After chilling until set, the result is a stunning centerpiece that tastes as wonderful as it looks, with the perfect balance of sweet creamy filling and buttery crunch.
The first time I attempted an Easter dessert for my family, I spent hours making an elaborate lamb cake that collapsed in the oven while everyone watched. My youngest cousin suggested we just make something colorful and fun instead, and that spontaneous pivot taught me that sometimes the most joyful holiday treats are the ones that embrace playfulness over precision.
Last spring, my neighbor dropped by unexpectedly with her kids while I was midswirl, and they stood on stools watching the colors merge like tie dye. We ended up making an extra one just so they could each take turns creating their own marble pattern, and hearing their delighted gasps at how the colors transformed made my whole weekend.
Ingredients
- Graham crackers or digestive biscuits (200 g): These create the perfect sandy crunch that contrasts beautifully with the silky filling
- Unsalted butter (75 g, melted): Use room temperature butter for easy pressing into the dish
- Granulated sugar (2 tbsp): Just enough sweetness to make the crust sing
- Cream cheese (250 g, softened): Leave it out for at least an hour for lump free results
- Mascarpone cheese (250 g): This Italian cheese adds an luxurious velvety texture
- Powdered sugar (120 g): Sift it first to avoid any gritty pockets
- Vanilla extract (1 tsp): Pure vanilla makes all the difference here
- Heavy cream (200 ml): Cold cream whips up faster and holds its shape better
- Gel food coloring: Gel colors are more concentrated than liquid and will not water down your filling
- Pastel sprinkles or mini chocolate eggs (2 tbsp, optional): The finishing touch that makes everyone smile
Instructions
- Prepare your crust foundation:
- Preheat your oven to 180°C (350°F) and combine the crushed biscuits with melted butter and sugar until it resembles wet sand, then press firmly into your pie dish using the back of a spoon.
- Bake to golden perfection:
- Bake the crust for 10 to 12 minutes until fragrant and golden, then let it cool completely before adding any filling.
- Create the creamy base:
- Beat together the cream cheese, mascarpone, powdered sugar, and vanilla until you have a silky smooth mixture with absolutely no lumps.
- Whip the cream:
- In a separate bowl, whip the cold heavy cream until soft peaks form, then gently fold it into the cheese mixture until no white streaks remain.
- Paint with pastels:
- Divide the filling between 3 or 4 small bowls and add a tiny drop of gel coloring to each, mixing until you have soft dreamy pastel shades.
- Swirl like magic:
- Spoon random dollops of each color onto the cooled crust, then take a skewer or knife and gently swirl through the filling just until the colors marble together.
- Chill until set:
- Smooth the top lightly, cover with plastic wrap, and refrigerate for at least 2 hours until the pie is completely firm.
- Add festive touches:
- Sprinkle with pastel sprinkles or arrange mini chocolate eggs on top right before serving for that extra holiday cheer.
 Pin it
 My mother finally admitted after years of pretending that she once forgot to chill the pie long enough and served it slightly runny, claiming it was a deconstructed dessert. We laughed so hard we decided to make intentionally imperfect swirls every year since, and those messy pies somehow taste the best.
Making It Your Own
I have learned that adding lemon zest to the filling brightens the whole pie and cuts through the richness beautifully. A touch of almond extract instead of vanilla creates a completely different but equally lovely flavor profile.
Perfect Pairings
This pie loves being served with something bubbly and sweet like Moscato dAsti, or for a cozy alternative, a cup of chamomile tea complements the creamy vanilla notes perfectly.
Serving And Storing
The pie needs at least 2 hours to set but is even better if made the night before, giving the flavors time to meld. Leftovers keep well in the refrigerator for up to 3 days, though in my house they disappear much faster.
- Let the pie sit at room temperature for 10 minutes before slicing for cleaner cuts
- Dip your knife in hot water and wipe it clean between slices for picture perfect portions
- Cover leftovers gently with plastic wrap to prevent the filling from absorbing other fridge odors
 Pin it
 There is something deeply satisfying about cutting into that first slice and revealing the unique swirl pattern you created, almost like opening a present you wrapped yourself. Happy Easter baking.
Recipe Questions & Answers
- → How far in advance can I prepare this swirled pie?
-
You can make this dessert up to 2 days in advance. The flavors actually develop better after resting overnight in the refrigerator. Keep it well-covered to prevent absorption of other food odors.
- → Can I use liquid food coloring instead of gel?
-
Gel coloring works best as it doesn't thin the filling. Liquid food coloring can alter the texture and make your mixture too runny, affecting how well the swirls hold their shape during chilling.
- → What's the secret to getting clean marble swirls?
-
The key is not to overmix when swirling. Use just 2-3 gentle figure-eight motions with your skewer or knife. The goal is distinct ribbons of color, not a blended muddy effect.
- → Can I freeze this swirled dessert?
-
Yes, you can freeze it for up to 1 month. Wrap tightly in plastic and foil. Thaw overnight in the refrigerator before serving. Note that the texture may be slightly denser after freezing.
- → What other crust options work well?
-
Beyond graham crackers, try vanilla wafers, shortbread cookies, or even oreos for a chocolate variation. For a nutty twist, mix crushed pecans or almonds into your crust crumbs.
